
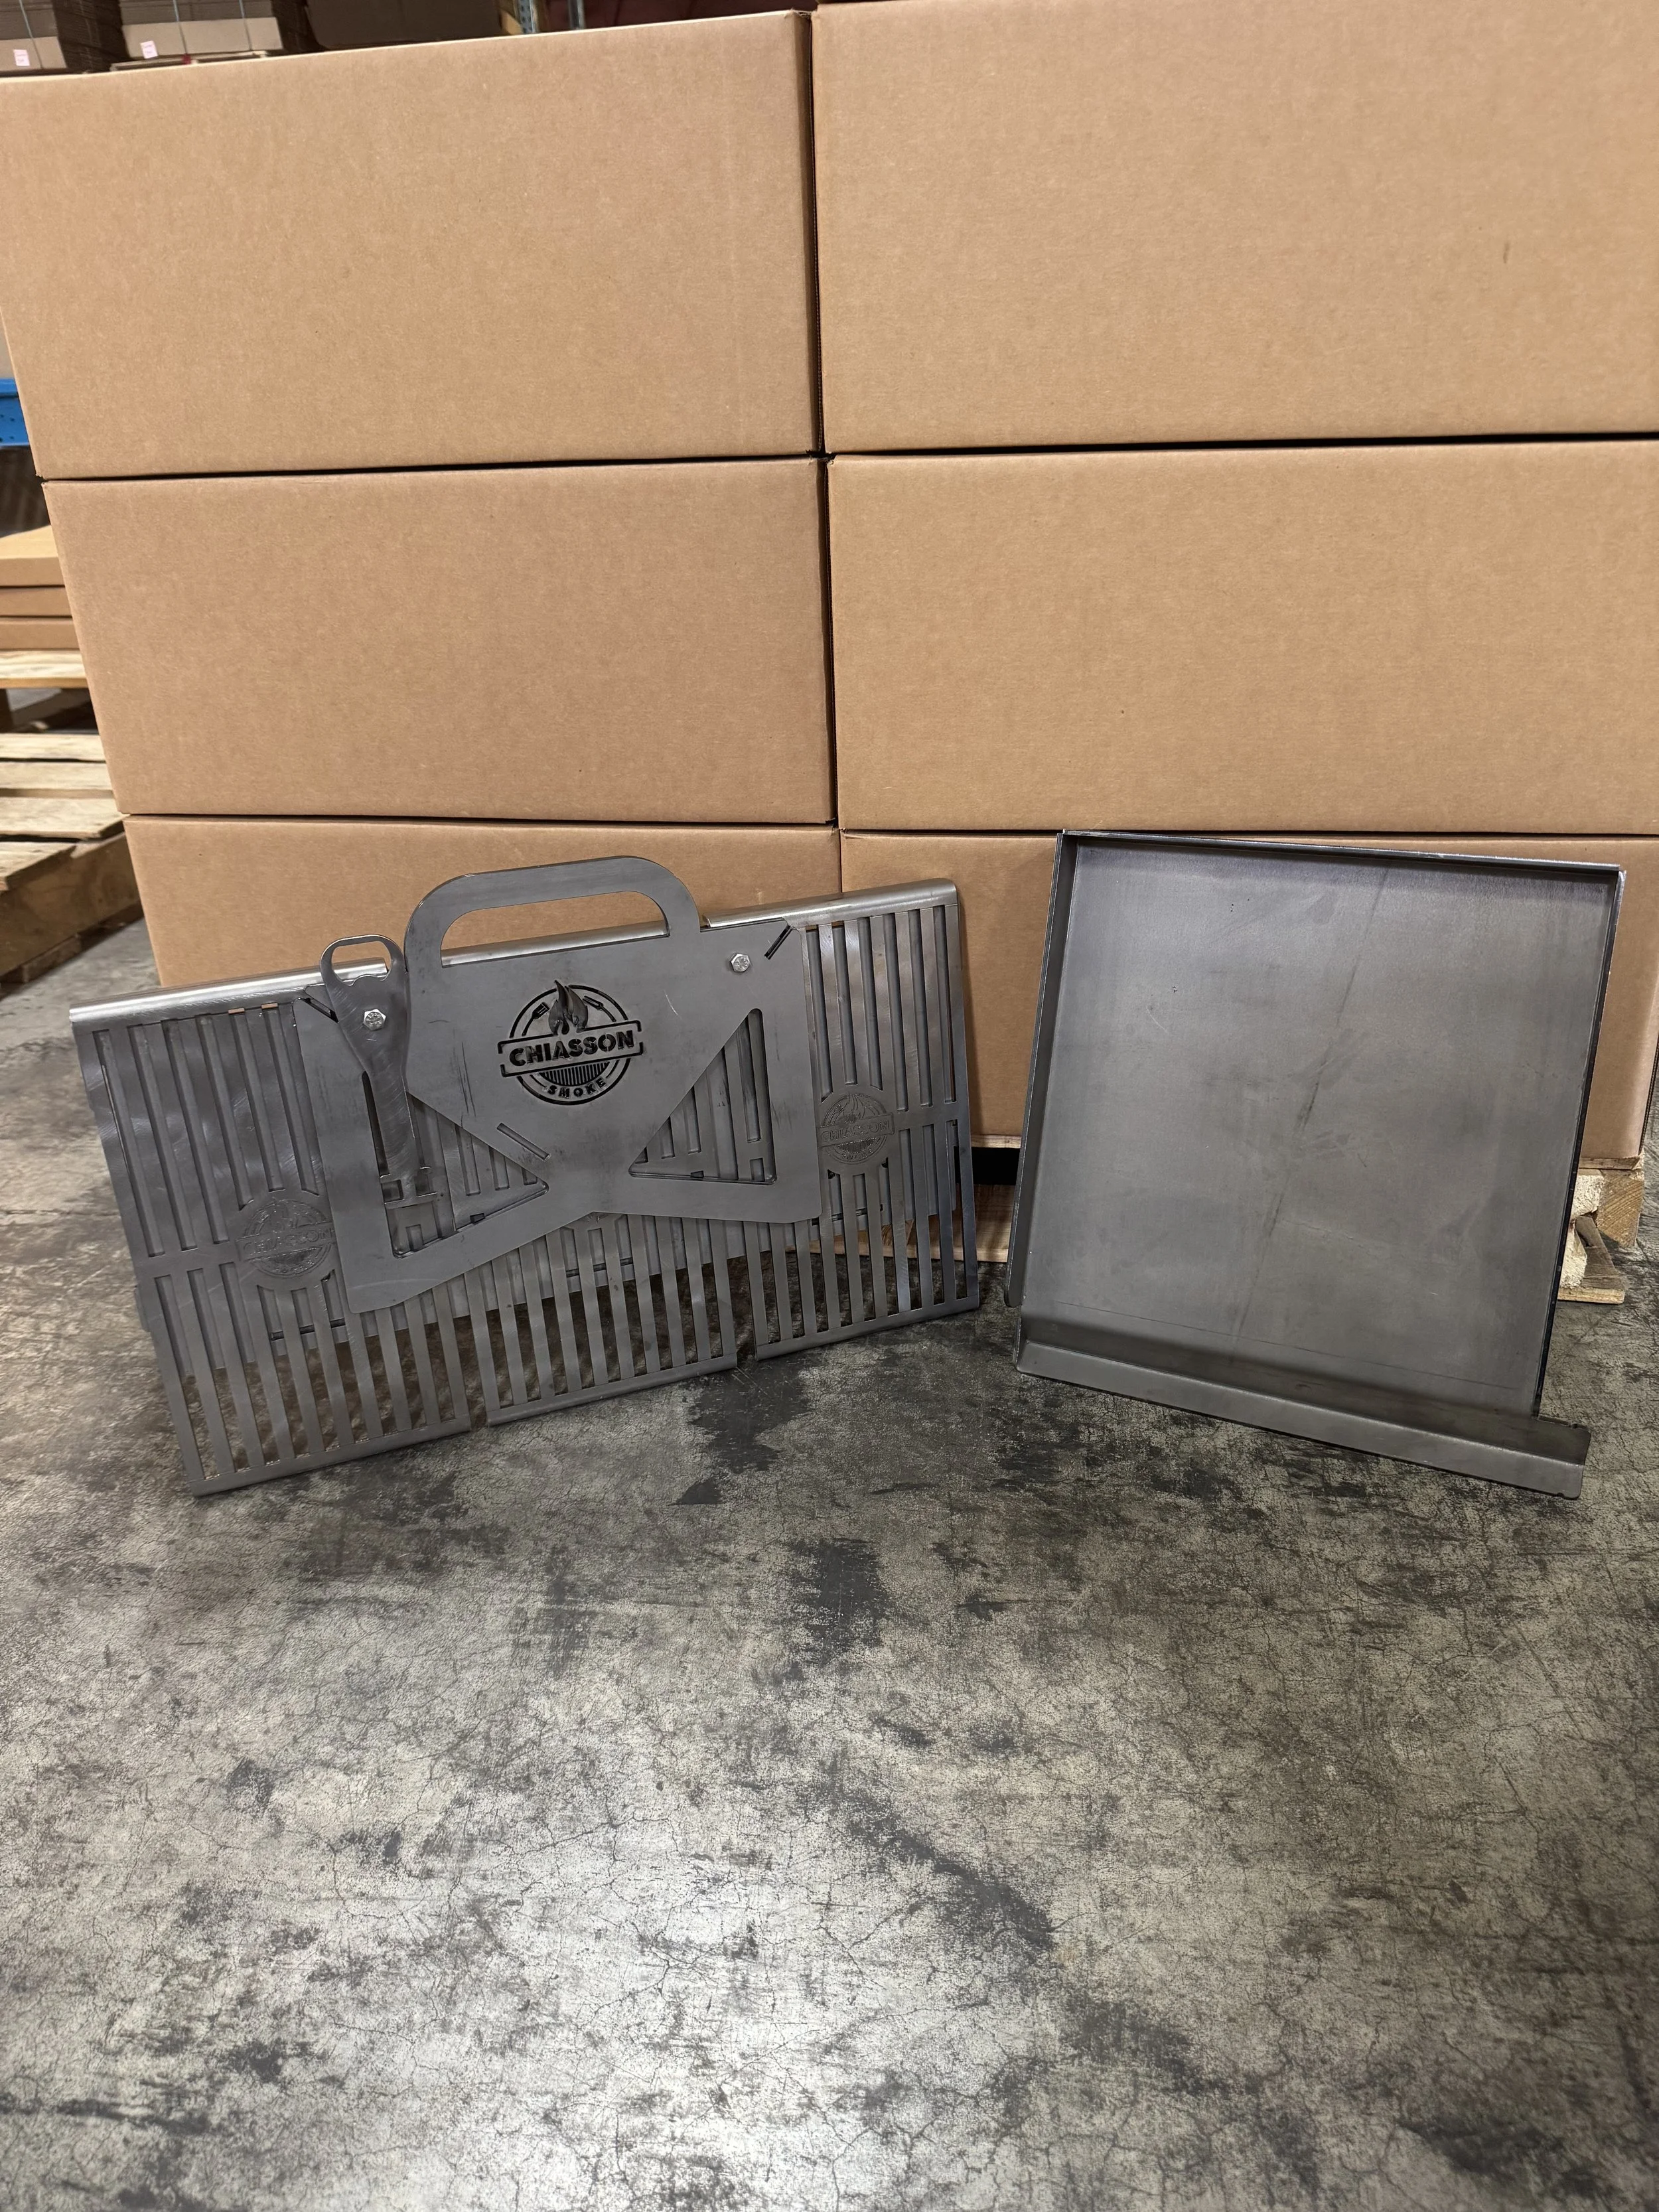
Hauler Grill (Griddle)
Thank you for your purchase of the hauler grill. We recommend treating your grill like a cast iron pan, oiling it every now and then to prevent rust.
Do not paint your grill, even with high heat paint. The paint will not last and could contaminate your food.
With proper care, your grill will last a lifetime!
Please read and review the safety guidelines listed below before use.


Materials & Build
Body: 1/8" carbon steel
Grates & Griddle: 10-gauge carbon steel, no coatings or scale
Finish: Mill scale removed carbon steel (season like cast iron)
Dimensions
Length: 21"
Width: 12"
Height: 12"
Optional Griddle Width: 12" (with built-in grease drain)
Weight: 25 pounds without griddle, 30 pounds with griddle
Packs flat for storage
Versatility That Performs
3 Removable Bent Grates
Designed for strength, modularity, and high heat.12” Steel Griddle with Drain
Cook anything from bacon and eggs to seared steak. Drain keeps cleanup easy.Bottle opener/grate remover
⚠️ Warning: Potential Pinch Hazard When Collapsed
When the Hauler Grill is in its collapsed (packed) position, please use caution when setting it straight down on a hard surface. The center grate may shift upward into the handle area, potentially creating a pinch point.
To avoid injury:
Set the packed grill down gently
Keep hands and fingers clear of the handle area during placement
Always inspect and secure the grate position before lifting or moving and make sure the bolts and wing-nuts are tight
Your safety matters. Stay aware—and keep those fingers safe.
Disclaimer & Safety Guidelines
We at Chiasson Smoke, LLC want to stress that this collapsible fire pit/grill should be enjoyed with responsibility. It is necessary to abide by these safety guidelines. Enjoy your adventure!
WARNING
This fire pit/grill is for outdoor use and should NOT be used in a building, garage, or any other enclosed area.
This fire pit/grill is NOT for use for children.
Always use in accordance with all applicable local, state and national fire codes.
If you purchased the large collapsible fire pit/grill, properly assemble the fire pit/grill. To secure the bottom plate properly, place stainless bolts in the holes on both sides.
This fire pit/grill is for use with dry wood or charcoal only.
Do not wear flammable or loose clothing when operating this fire pit/grill.
Do not use in windy conditions.
All surfaces of this fire pit are hot when in operation. Do NOT touch any part of the fire pit/grill until it has cooled completely.
Do NOT leave the fire pit/grill unattended.
Do NOT attempt to move or store this fire pit/grill until all ashes and coals are completely extinguished.
Do NOT overload the fire pit/grill. This will always increase the likelihood of starting a fire outside of the pit.
Avoid breathing in smoke from the fire and avoid getting smoke in your eyes.
Use ONLY on level ground on a non-flammable surface.
Death, serious injury, or property damage may occur if the above is not followed exactly.
Beware, if you bought the Hauler grill, there may be a pinch point between the handle and the middle grill grate when set straight down.
How to assemble the Hauler Grill

Your hauler grill will have the following parts:
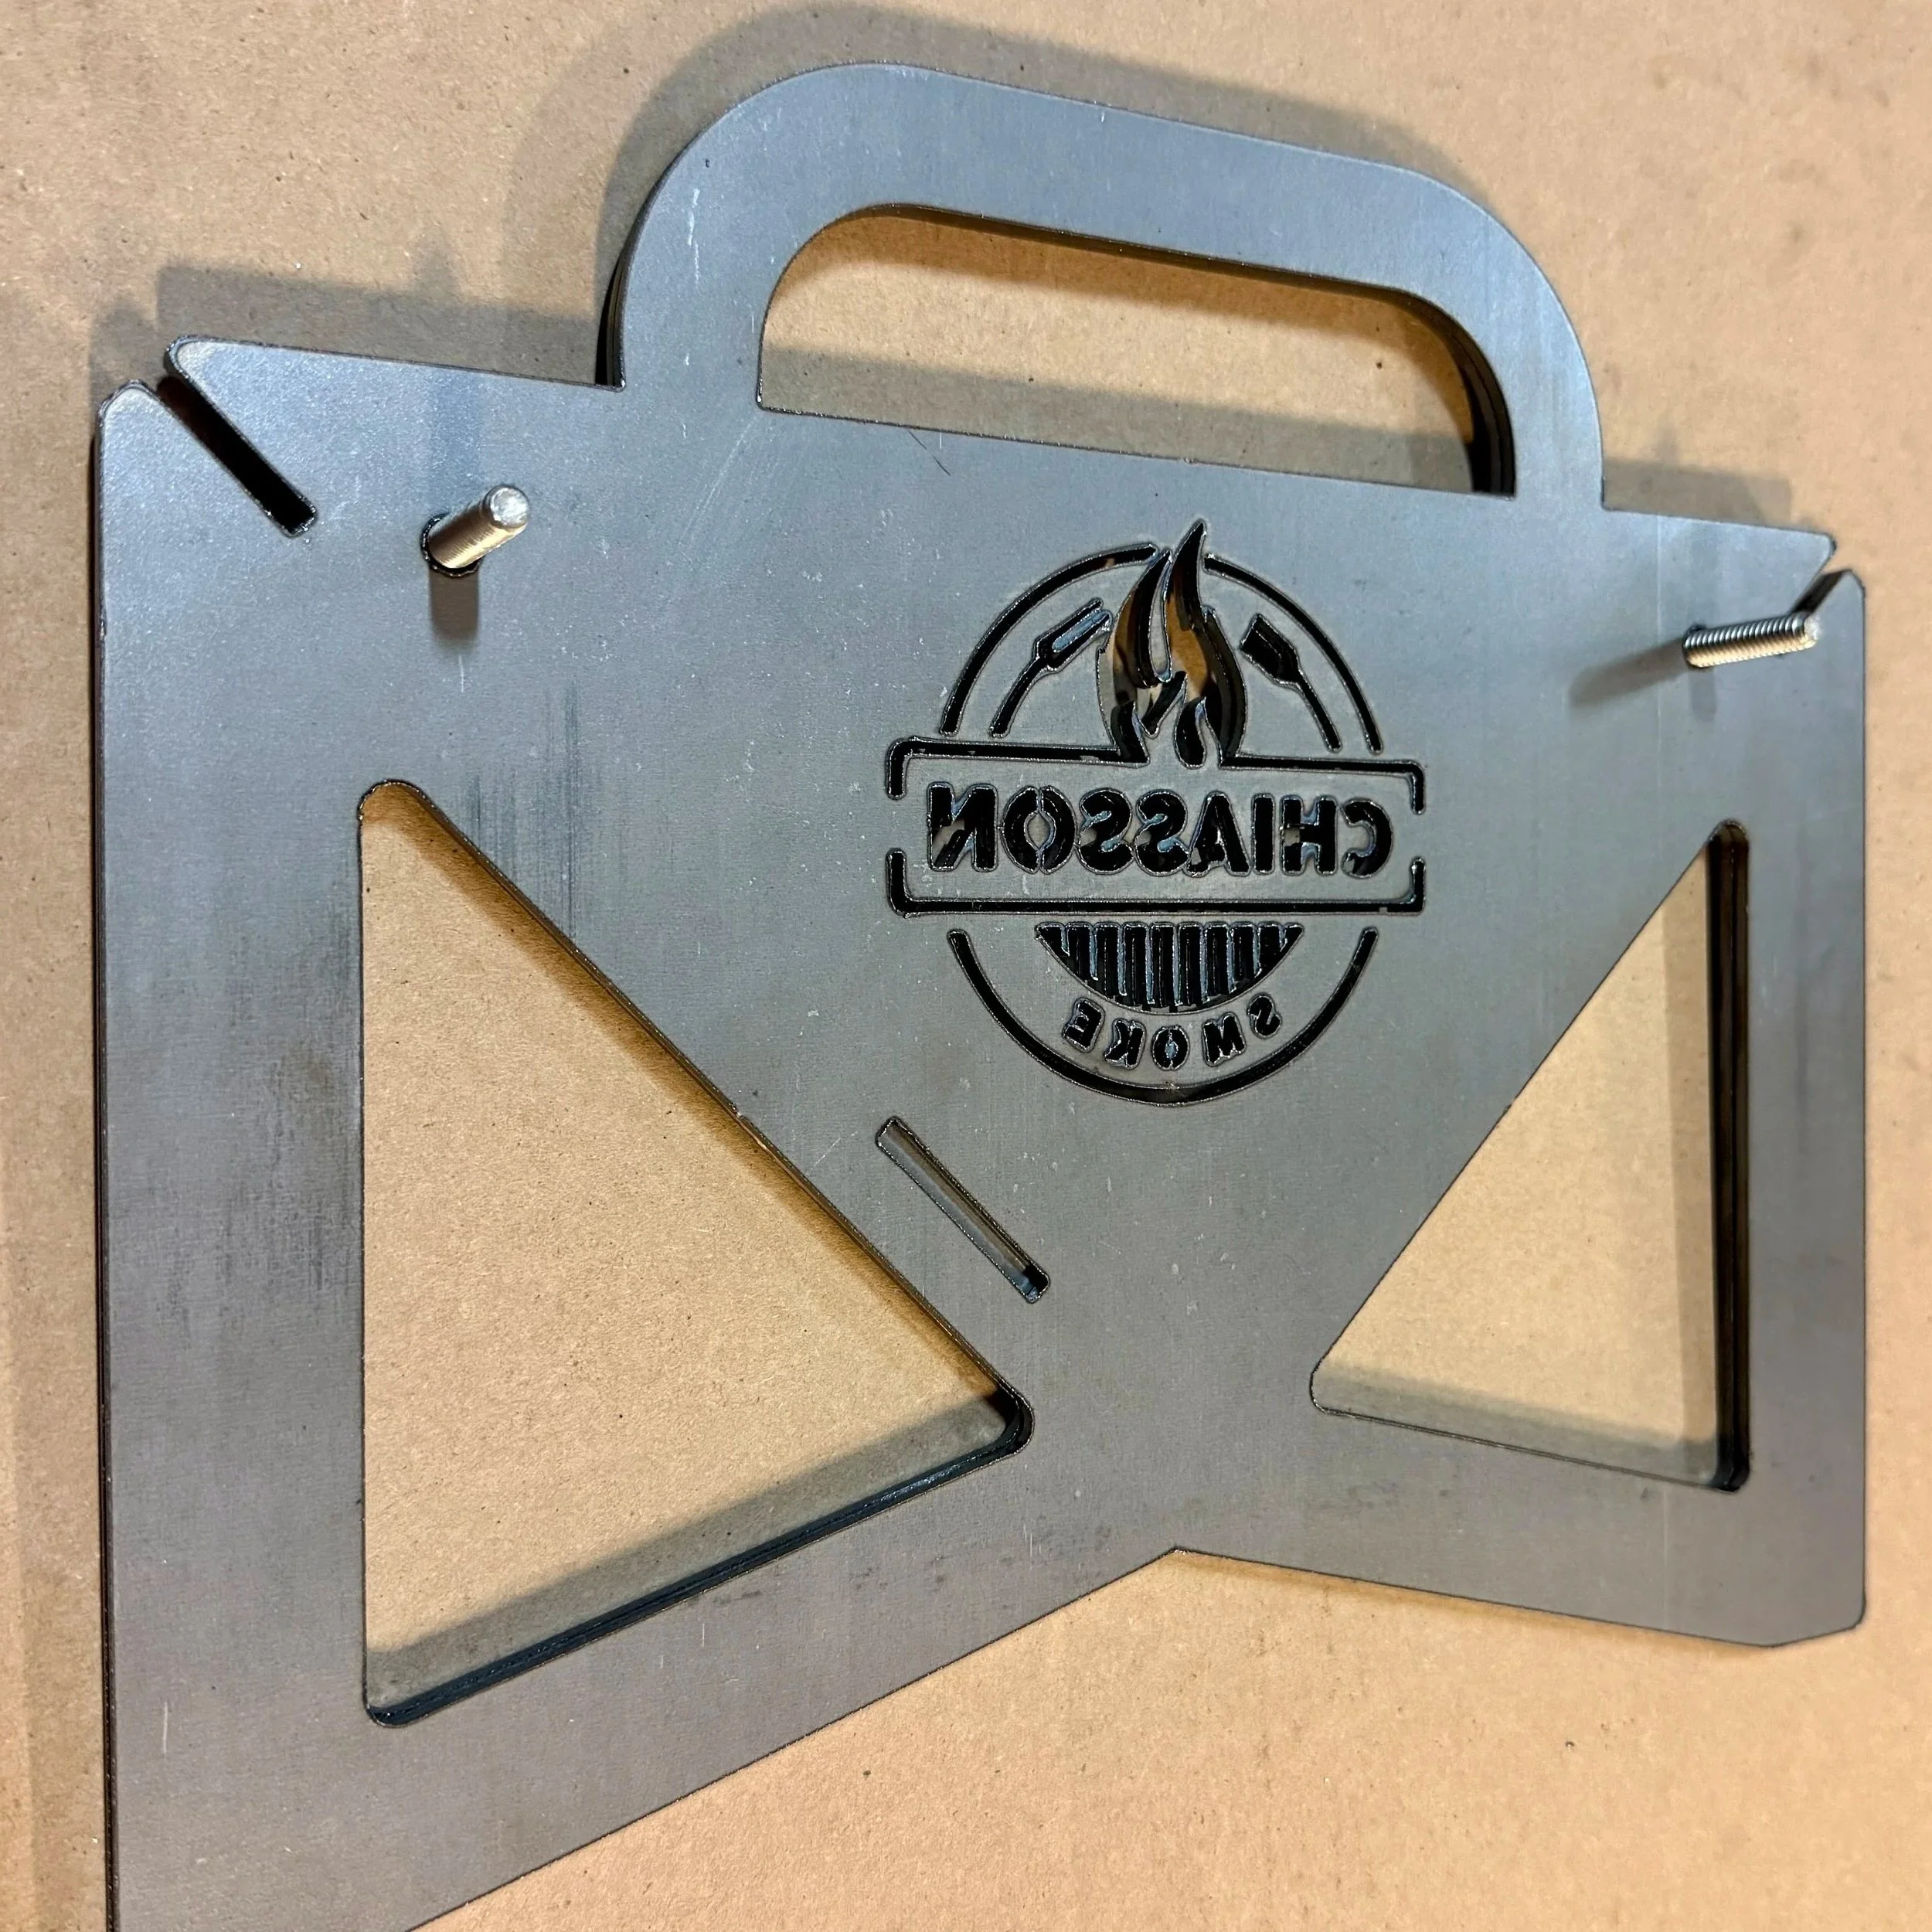
A left and right side with the cut-out logos (left and right will be defined by the slot position under the logo)
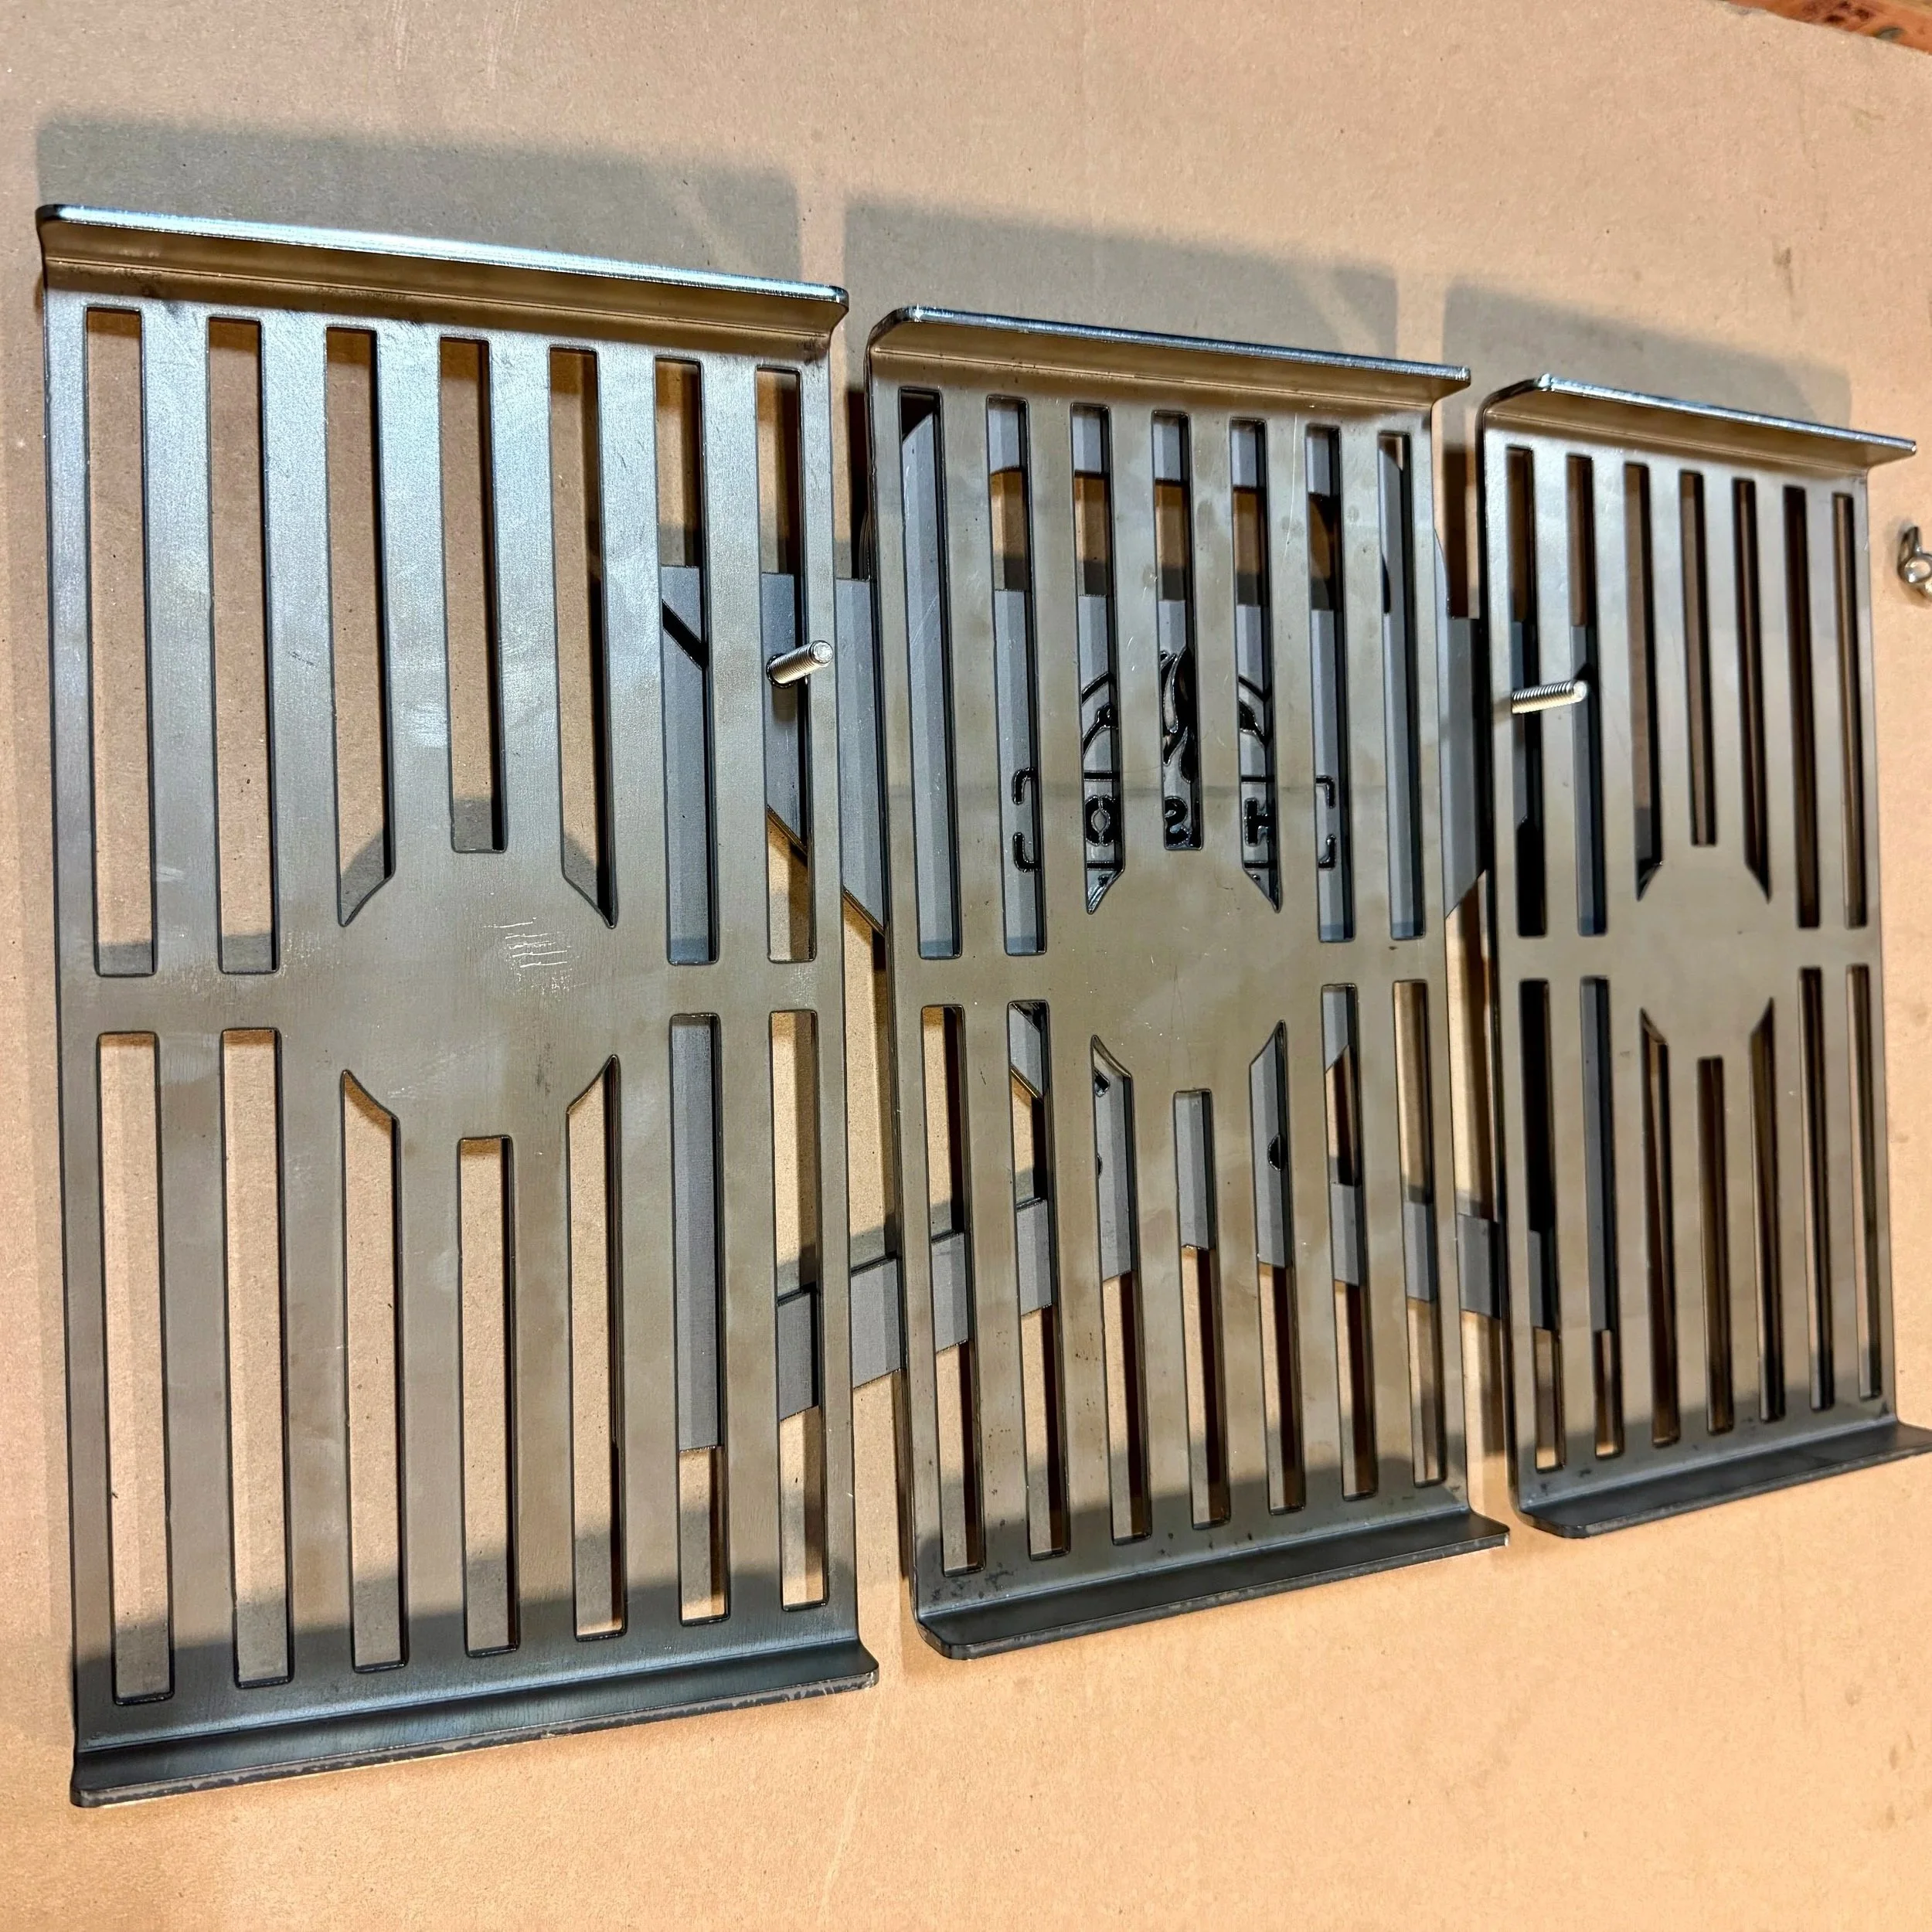
3 cooking grates
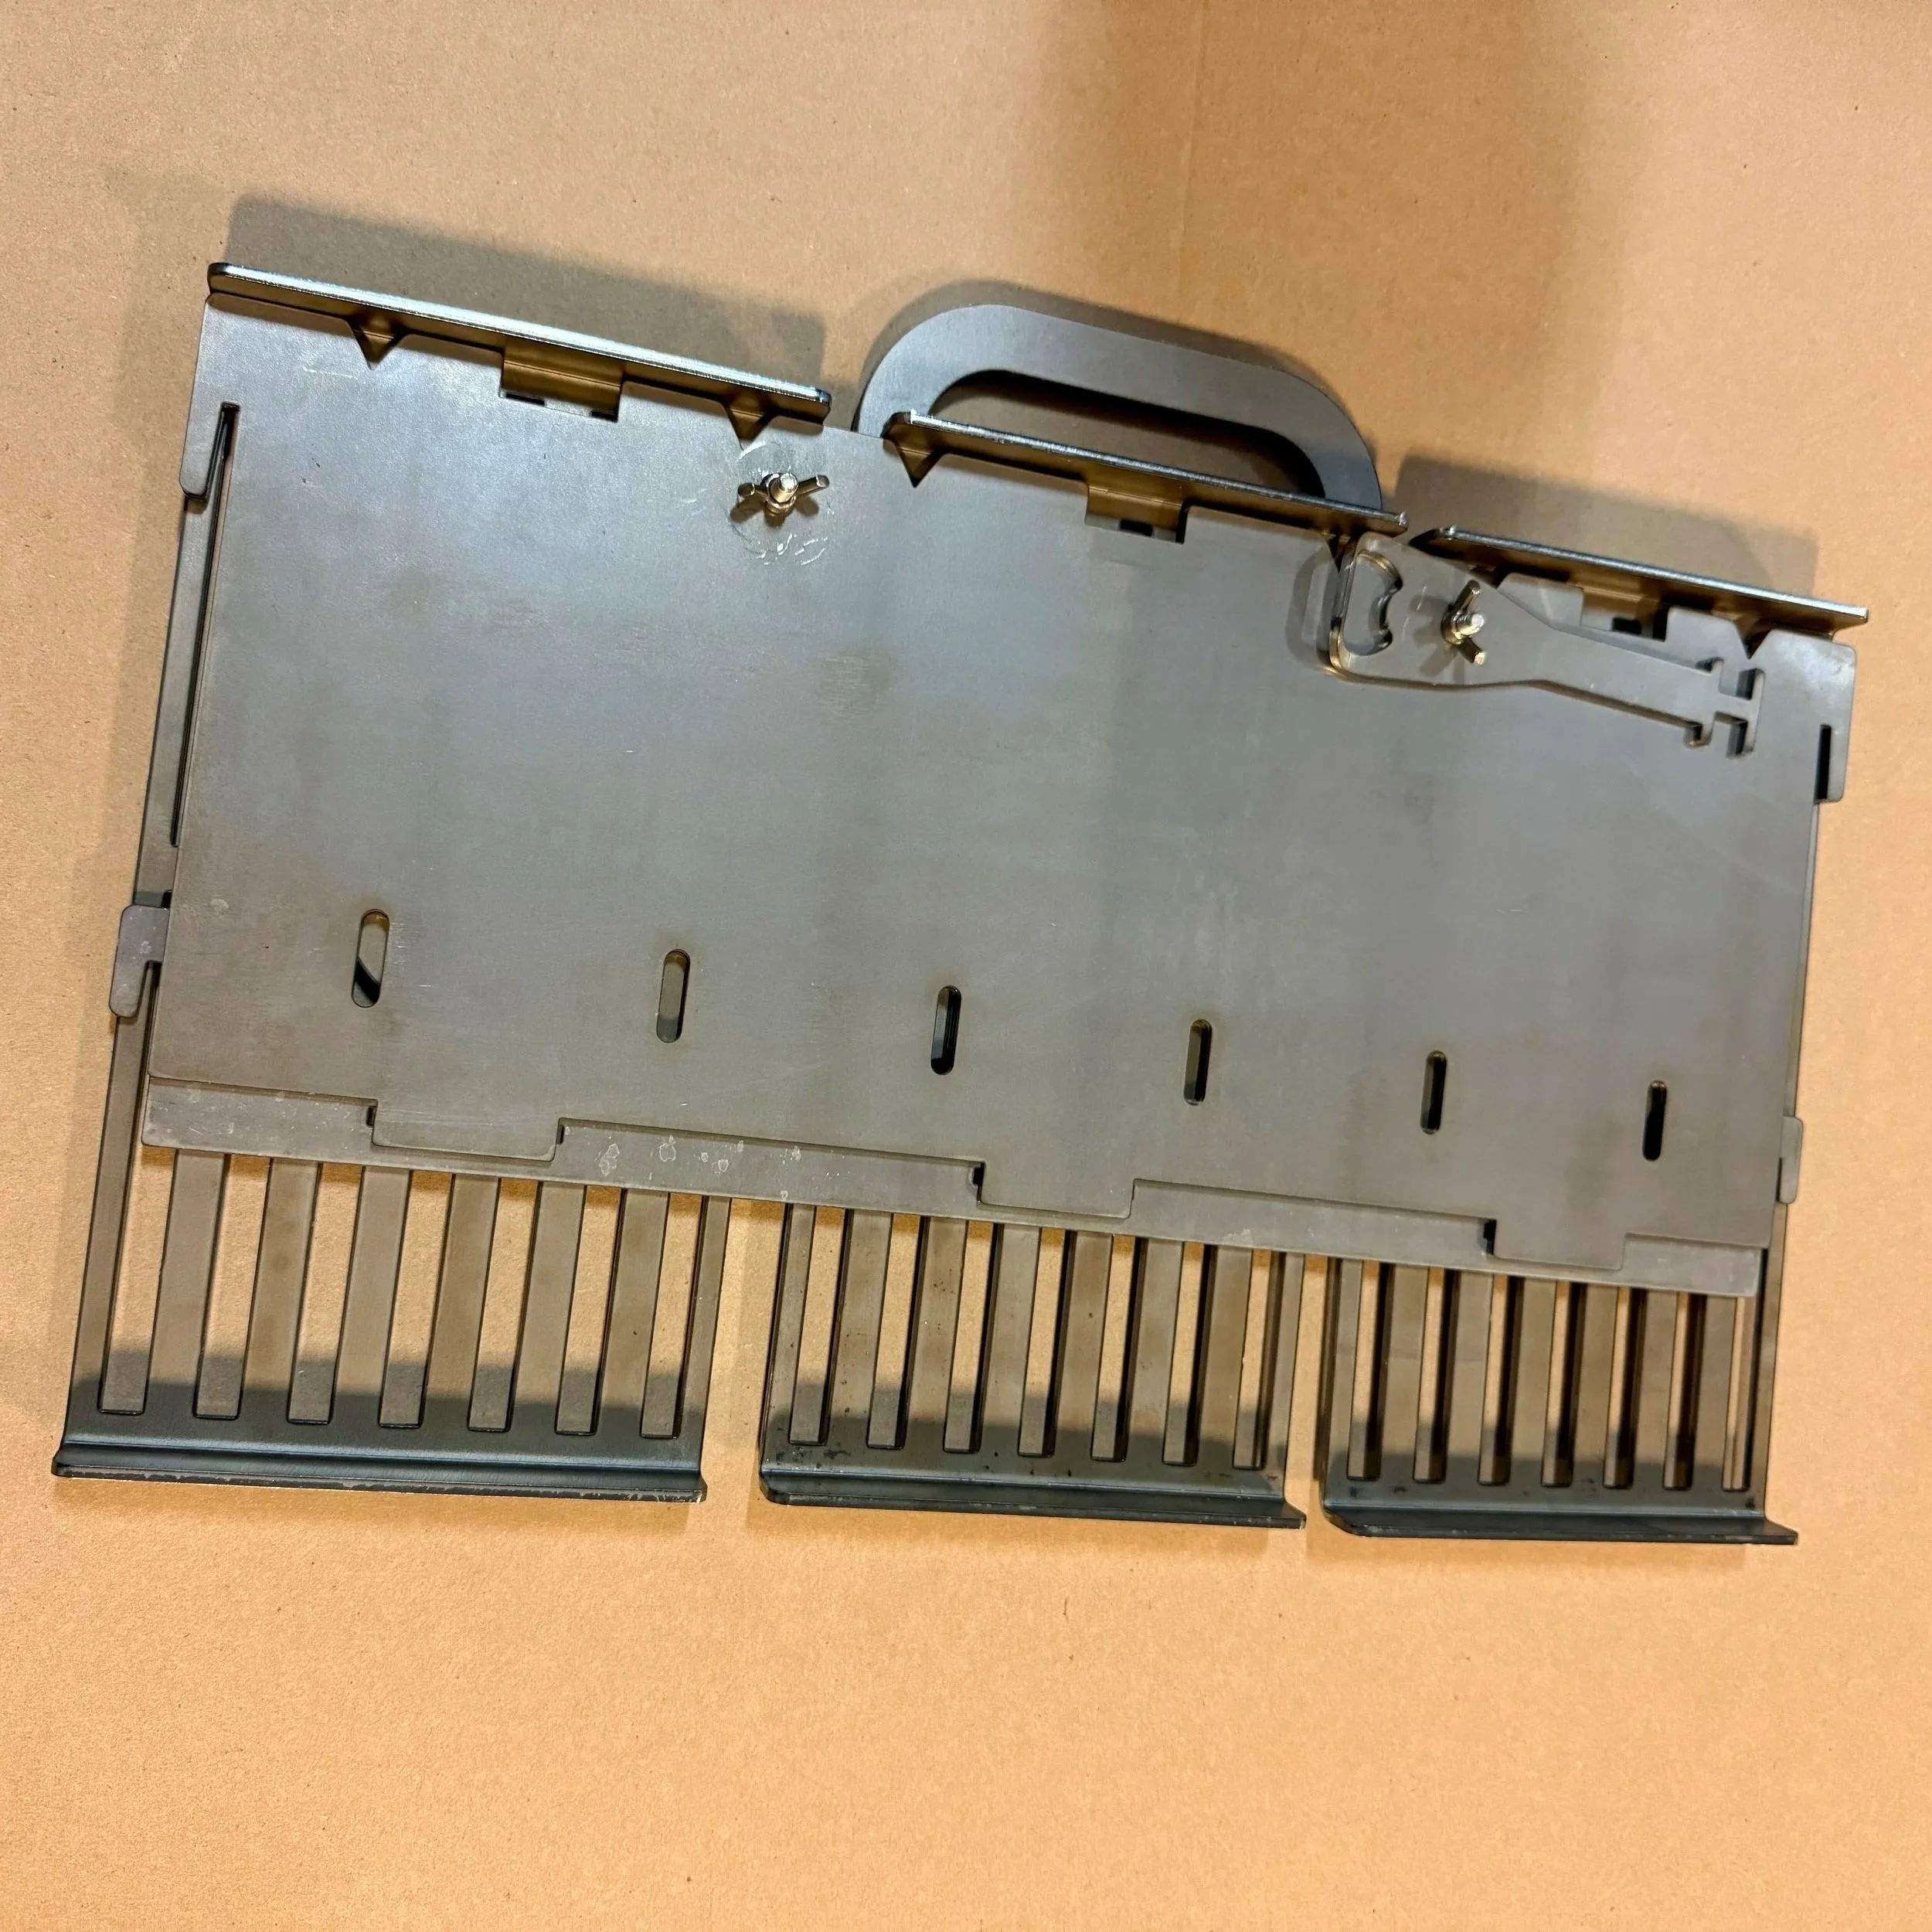
2 bottom pieces (1 will have tabs on the bottom and 1 will have slots)
A grill grate “key” (that doubles as a bottle opener)
2 bolts with wing nuts (these are to flat pack your grill)


STEP ONE
Place your side pieces, logo out
Select the bottom piece with the slots, align the tabs on each side
Slide into place securely
STEP TWO
Similar to step 2, place the other bottom piece in, this time fitting the bottom tabs into the slots (as pictured)
The side tabs should also fit securely
Your grill should be secure and sturdy at this time

STEP THREE
Place all three grates on the grill (for cooking as just a grill top)
If you ordered the griddle, you can remove 2 of the grates (or all if desired) and replace with the griddle (we recommend the griddle on the right side because on the grease trap)

GRILL KEY
This tool is designed to assist in lifting off and on our grill grates. Place the end in sideways, turn and place the teeth between the grates, and lift.
The opposite side is a bottle opener.
The drilled hole is to attach it back to the grill once it is flat packed.
STEP ONE
Place both end (the sides with the logos on it) together.
Line up the holes and place both bolts with the head of the bolt down (this will allow you to stack the rest of your grill easily.
STEP TWO (This part is the trick to the flat pack)
The left grate will have a bolt running through the last grate slot on the far right side.
The right grate will have a bolt running through the last grate slot on the far left side.
The center grate will float in the middle, temporarily.

STEP THREE
Next, place the bottom piece that has the slots on the bottom of it.
Line up and put the bolts through the holes, as shown.
Now you want to slide the grates down, evenly spacing them, until the edge/lip on the gate in against the bottom piece. This will hold your middle grate in place properly.

STEP FOUR
Place the remaining bottom piece (with the tabs on the bottom) on the bolts.
Add the grate/grill key on to once of the bolts (it doesn’t matter which)
STEP FIVE
Now add the wing nuts to the flat pack.
Please make sure these are tightened properly.
WARNING: If the bolts/nuts are NOT tight, the pieces will cause a pinch point when placing the grill down (if on it’s side) with the handle area. Be aware and please be careful.